Here I’ll explain how to do CMYK color separation for screen printing. Why buy a software that’ll cost you a lot if you can do it with your photoshop? And what if you don’t have any postscript printer on your desk, so you have to make the dots on your own? What if you have the postscript printer, but your artwork is larger than your printer size can hold? I’ll explain those here.
See the cost:
Color separation software: US$ 299.oo
Color separation service : US$ 35.oo each file (US) or IDR 15,oo/mm /color (Indonesia)
Photoshop Color Separation Plugin : US$99.oo
Make your own with photoshop : free (Photoshop software price and printing fees are not included)
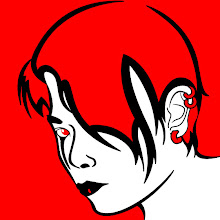
First, prepare your image or graphic. Here I use the illustration of “Nightmare” a Soul Calibur IV character.
- Prepare the image (make sure it’s large enough), and change the resolution to 300dpi by choose menu Image> Image Size.
- Change the color mode to CMYK by choosing menu Image>Mode then you’ll see that the channels is changed to Cyan, Magenta, Yellow, and Black.
- Click the option of channels panel (the little triangle on the right upper corner) and choose split channel
- Now You got C M Y and K channel split with gray in mode.
- Choose menu image>mode>bitmap
- Set the output resolution to 300 dpi and method to “halftone screen”
- Set the frequency to 45 lpi to 55 lpi, depends on your screen mesh. Let’s choose 45 for now (it is safer). And set the shape to ellipse
- Do this to every channel, with unique angle for each separated color. The angles are C=15, M=45, Y=75 and K=75 so you won’t get a moiré pattern.
- To simulate the printing, make a new file on CMYK mode, change it to multichannel mode, copy and paste each color on its channel. WAY SO SIMPLE!
Note: if you don’t want to do the tutorial I’ve explained, please download the photoshop CS3 Action i’ve made from here . Place it under X:\Program Files\Adobe\Adobe Photoshop CS3\Presets\Actions (for x32 OS which “X” refer to the disk drive where Photoshop installed)
You can download the full tutorial including picture here (.pdf)


No comments:
Post a Comment